Elegant Homemade Milano Cookie Recipe
Milano cookie recipe adventures are about to get a whole lot more delicious! There’s something undeniably captivating about those crisp, delicate cookies, with their satisfying snap and a rich, chocolatey embrace. I’ve always adored the way the smooth, almost melt-in-your-mouth chocolate contrasts with the buttery shortbread base – it’s a symphony of textures and flavors that feels both elegant and incredibly comforting. What truly makes a homemade Milano cookie recipe so special is the opportunity to recreate that signature elegance in your own kitchen, perhaps even adding your own personal touch. Forget store-bought; we’re diving into a world of pure, unadulterated cookie bliss. Get ready to impress yourself (and anyone lucky enough to share these with you) with this truly delightful Milano cookie recipe.

Milano Cookie Recipe
There’s something undeniably elegant about a Milano cookie. That delicate, crisp biscuit sandwiching a rich, decadent chocolate filling – it’s a treat that feels both sophisticated and comforting. While you can certainly find these delightful cookies in many bakeries and shops, recreating them at home is incredibly rewarding, and surprisingly achievable. The joy of biting into your own homemade Milano, with its perfect balance of buttery cookie and smooth chocolate, is a culinary triumph worth celebrating. This recipe will guide you through each step, ensuring your homemade Milanos are every bit as delightful as the ones you love.
Ingredients:
- 1 1/4 cups all-purpose flour
- 1/2 teaspoon kosher salt
- 8 tablespoons unsalted butter (room temperature)
- 1 1/4 cups powdered sugar
- 1 large egg white (room temperature)
- 1 large egg (room temperature)
- 1 teaspoon vanilla extract
- 1 1/2 tablespoons unsalted butter (melted and cooled)
- 1 1/4 cups chopped dark chocolate
- 1/3 cup heavy cream
- Mint extract (optional)
Crafting the Cookie Dough
The foundation of our Milano cookie is a crisp, slightly sweet cookie that holds its shape beautifully. We’ll start by creaming together the butter and sugar, a crucial step for developing the cookie’s tender texture.
1. In a medium bowl, whisk together the all-purpose flour and kosher salt. Set this aside. In a large bowl, using an electric mixer on medium speed, cream together the 8 tablespoons of room-temperature unsalted butter and the 1 1/4 cups of powdered sugar until the mixture is light and fluffy, about 3-4 minutes. Scrape down the sides of the bowl as needed. The powdered sugar, unlike granulated sugar, dissolves more readily and contributes to a smoother, more delicate cookie texture. This creaming process incorporates air, which will help leaven the cookies slightly.
2. Add the large egg white and the large egg to the creamed butter and sugar mixture. Beat on medium-high speed until well combined and the mixture is smooth, about 1 minute. Don’t worry if the mixture looks a little curdled at this stage; it will come together when you add the dry ingredients. Next, beat in the 1 teaspoon of vanilla extract until just incorporated. It’s important that your eggs are also at room temperature, as this helps them emulsify better with the butter and sugar, leading to a more uniform dough.
3. Gradually add the dry ingredients (flour and salt mixture) to the wet ingredients, mixing on low speed until just combined. Be careful not to overmix; overmixing can develop the gluten in the flour too much, resulting in tough cookies. You want a soft, pliable dough that’s easy to handle. The dough will be quite soft at this point. To make it easier to handle and to ensure the cookies bake evenly, we need to chill it. Cover the bowl tightly with plastic wrap and refrigerate for at least 1 hour, or until firm enough to shape. Chilling the dough allows the fats to solidify, making the dough less sticky and easier to roll out or pipe.
Shaping and Baking the Cookies
This is where our Milano cookies start to take their iconic shape. Patience and a steady hand are key here.
4. Preheat your oven to 350°F (175°C). Line two baking sheets with parchment paper. This prevents sticking and makes for easier cleanup. Turn the chilled dough out onto a lightly floured surface. The dough should be firm enough to handle now. You can either roll the dough to about 1/4-inch thickness and cut out oval shapes, or for a more authentic Milano look, you can pipe the dough. If piping, transfer the dough to a piping bag fitted with a large oval or round tip. Pipe oblong shapes, about 3 inches long and 1 1/2 inches wide, onto the prepared baking sheets, leaving about 1 inch between cookies to allow for spreading. Ensure your shapes are relatively uniform in size for even baking. If you’re struggling with the consistency of the dough for piping, a brief stint back in the refrigerator might be helpful.
5. Bake for 10-12 minutes, or until the edges are lightly golden brown and the centers are set. The cookies should be lightly colored, not deeply browned, to maintain their delicate texture and flavor. Let the cookies cool on the baking sheets for 5 minutes before carefully transferring them to a wire rack to cool completely. It’s crucial that the cookies are completely cool before assembling with the chocolate filling, otherwise, the filling will melt and become messy.
Creating the Decadent Chocolate Filling
The chocolate filling is the luxurious heart of the Milano cookie. A simple ganache provides the perfect smooth, rich contrast to the crisp cookie.
6. While the cookies are cooling, prepare the chocolate filling. In a small heatproof bowl, combine the 1 1/4 cups of chopped dark chocolate. In a small saucepan, heat the 1/3 cup of heavy cream over medium heat until it just begins to simmer around the edges. Do not let it boil. Pour the hot cream over the chopped chocolate. Let it sit undisturbed for 5 minutes to allow the chocolate to melt.
7. Gently whisk the chocolate and cream together until a smooth, glossy ganache forms. Stir in the 1 1/2 tablespoons of melted and cooled unsalted butter. This butter adds extra richness and a beautiful sheen to the ganache. If you’re opting for a mint-flavored Milano, now is the time to stir in a few drops of mint extract, starting with 1/4 teaspoon and adding more to taste. Be careful not to overpower the chocolate flavor.
Assembling Your Milano Masterpieces
The final step is bringing everything together. This is where your beautiful cookies transform into elegant Milanos.
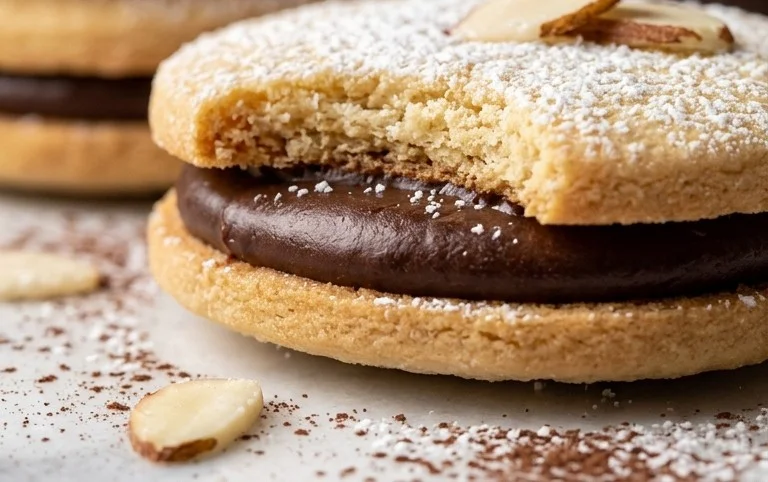
8. Once the cookies are completely cool, it’s time to assemble. Spread about 1-2 teaspoons of the chocolate ganache onto the flat side of one cookie. Top with another cookie, flat side down, to create a sandwich. Gently press the cookies together. The ganache will ooze slightly from the sides, which is perfectly normal and part of the charm. Repeat this process with the remaining cookies. If you find the ganache is too firm to spread easily, you can gently warm it for a few seconds in the microwave, but be very cautious not to overheat it.
9. Allow the assembled cookies to sit at room temperature for about 15-20 minutes to allow the chocolate filling to set slightly. For a firmer filling, you can refrigerate the cookies for about 30 minutes. Store your finished Milano cookies in an airtight container at room temperature for up to 5 days. Enjoy these exquisite homemade treats with a cup of coffee or tea, or as a delightful dessert. You’ve just created a taste of pure indulgence!
Conclusion:
So there you have it – a delightful and surprisingly simple Milano cookie recipe that’s guaranteed to impress. These cookies are wonderfully crisp yet tender, with that perfect buttery flavor and a delicate melt-in-your-mouth texture that makes them truly special. They’re fantastic on their own, perfect for enjoying with your morning coffee or afternoon tea, and they make for an elegant dessert. I encourage you to give this recipe a try; you’ll be amazed at how easily you can create these bakery-worthy treats in your own kitchen. Feel free to get creative with serving – they’re wonderful dipped in chocolate, sandwiched with a complementary ganache, or even crumbled over ice cream.
For even more enjoyment, consider these variations: add a hint of almond extract to the dough for a deeper flavor profile, or incorporate finely chopped nuts like pistachios or almonds into the cookie itself. You could also try experimenting with different types of chocolate for dipping, such as dark, milk, or even white chocolate. The possibilities are endless!
Frequently Asked Questions:
Q: Can I make the dough ahead of time?
A: Yes, absolutely! The Milano cookie dough can be refrigerated for up to 3 days. This makes it a great make-ahead option for busy days. Just ensure it’s well-wrapped to prevent it from drying out. You may need to let it soften slightly at room temperature before shaping.
Q: My cookies spread too much. What went wrong?
A: Over-mixing the dough after adding the flour can lead to excess gluten development, causing spread. Also, ensure your oven temperature is accurate; if it’s too low, the cookies will spread more before setting. Chilling the shaped cookies for a few minutes before baking can also help prevent excessive spreading.
Milano Cookie Recipe
A classic chocolate-dipped cookie resembling a Milanese biscuit, featuring a buttery shortbread base and rich chocolate coating.
Ingredients
-
1 1/4 cups all-purpose flour
-
1/2 teaspoon kosher salt
-
8 tablespoons unsalted butter, room temperature
-
1 1/4 cups powdered sugar
-
1 large egg white, room temperature
-
1 large egg, room temperature
-
1 teaspoon vanilla extract
-
1 1/2 tablespoons unsalted butter, melted and cooled
-
1 1/4 cups chopped dark chocolate
-
1/3 cup heavy cream
-
mint extract (optional)
Instructions
-
Step 1
Preheat oven to 350°F (175°C). Line baking sheets with parchment paper. -
Step 2
In a medium bowl, whisk together the flour and salt. Set aside. -
Step 3
In a large bowl, cream together the softened butter and powdered sugar until light and fluffy. Beat in the egg white, egg, and vanilla extract until well combined. -
Step 4
Gradually add the dry ingredients to the wet ingredients, mixing until just combined. Do not overmix. -
Step 5
Drop rounded tablespoons of dough onto the prepared baking sheets, about 2 inches apart. Flatten each cookie slightly with the palm of your hand or the bottom of a glass. -
Step 6
Bake for 10-12 minutes, or until the edges are lightly golden brown. Let cool on the baking sheets for a few minutes before transferring to a wire rack to cool completely. -
Step 7
While cookies are cooling, prepare the chocolate dip. In a heatproof bowl, combine the chopped dark chocolate and melted butter. Microwave in 30-second intervals, stirring between each, until melted and smooth. Stir in the heavy cream and optional mint extract until smooth. -
Step 8
Dip one half of each cooled cookie into the chocolate mixture. Place on parchment paper to set.
Important Information
Nutrition Facts (Per Serving)
It is important to consider this information as approximate and not to use it as definitive health advice.
Allergy Information
Please check ingredients for potential allergens and consult a health professional if in doubt.