The Perfect Peach Pie Recipe-Taste of Summer
The Perfect Peach Pie is a summer dream brought to life. There’s something undeniably magical about biting into a slice of warm, flaky crust, cradling tender, juicy peaches bursting with sunshine. It’s a dessert that evokes nostalgia, conjuring memories of sun-drenched afternoons and backyard gatherings. This isn’t just any fruit pie; it’s a celebration of peak-season produce, a symphony of sweet and slightly tart flavors that dance on your palate. What makes our version truly special is the careful balance of spices, the technique for achieving that perfect, melt-in-your-mouth filling, and a crust that’s both buttery and shatteringly crisp. Forget store-bought imitations; this recipe will guide you to creating your own unforgettable Perfect Peach Pie that will have everyone asking for seconds.
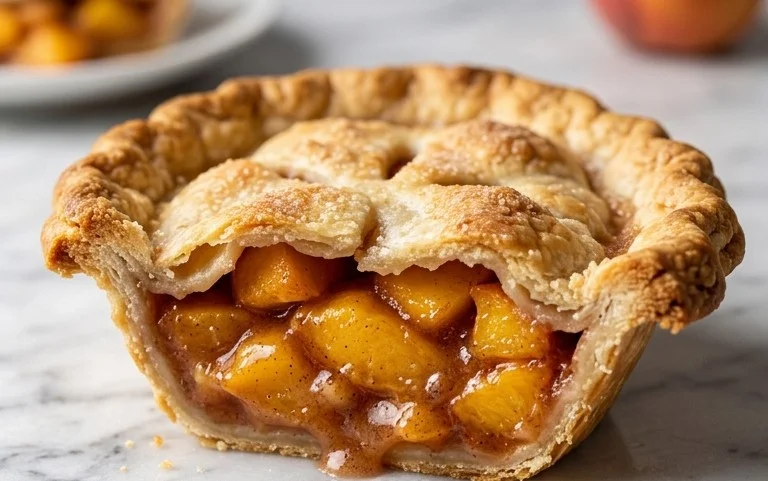
The Perfect Peach Pie
There’s something undeniably comforting and summery about a slice of warm peach pie. The sweet, juicy peaches bursting with flavor, encased in a flaky, golden crust – it’s pure bliss. While store-bought options can be convenient, nothing quite compares to the aroma and taste of a homemade peach pie, crafted with love and the freshest ingredients. This recipe aims to guide you to that perfect pie, with tender, flavorful peaches and a crust that’s both crisp and melt-in-your-mouth. Don’t be intimidated; with a little patience and this detailed guide, you’ll be enjoying a slice of sunshine in no time.
Ingredients:
Crafting the Perfect Peach Pie: Step-by-Step
Creating this pie is a journey, and each step is important for achieving that flawless result. From preparing the peaches to achieving that beautiful golden crust, let’s dive in.
1. Preparing the Peach Filling:
Start by carefully preparing your peaches. You’ll need about 5 cups of sliced peaches, and I find it best to slice them about 1/2 inch thick. This thickness allows them to soften beautifully during baking without turning into mush. If your peaches are very ripe and soft, be a bit more gentle when slicing. In a large bowl, gently combine your sliced peaches with the lemon juice. The lemon juice not only adds a bright, subtle tang that balances the sweetness of the peaches but also helps prevent them from browning if you’re not assembling the pie immediately. Next, in a separate, smaller bowl, whisk together the all-purpose flour and cornstarch. These two work together to thicken the peach juices as they bake, preventing a watery pie. Add this dry mixture, along with the white sugar, brown sugar, cinnamon, and salt, to the bowl with the peaches. Gently toss everything together until the peaches are evenly coated. Don’t overmix, as this can bruise the delicate fruit. The sugars will start to draw out some moisture from the peaches, creating a lovely syrupy base.
2. Assembling the Pie Base:
Now for the crust! If you’re using a store-bought pastry, let it come to room temperature slightly according to package directions so it’s easier to handle. If you’re making your own pie crust, ensure it’s chilled and ready to go. Gently unroll one of your pie crusts and carefully press it into a 9-inch pie plate. Try to get it to fit snugly without stretching it too much, as this can cause it to shrink during baking. Trim any excess dough, leaving about a 1-inch overhang. You can crimp the edges decoratively later.
3. Filling the Pie:
Carefully pour the prepared peach filling into the pie crust-lined plate. Try to distribute the peaches evenly. Dot the top of the peach filling with the 2 tablespoons of cold butter, cut into small pieces. These little pockets of butter will melt and add richness to the filling as it bakes, contributing to that irresistible flavor.
4. Creating the Top Crust and Finishing Touches:
This is where you can get creative! You can opt for a full top crust, a lattice top, or even cut out decorative shapes. For a full top crust, gently unroll your second pie crust and place it over the peach filling. Trim the excess dough, leaving a 1-inch overhang. Fold the overhang of the bottom crust up and over the edge of the top crust, then crimp the edges together to seal. If you’re going for a full top crust, be sure to cut several vents in the top with a sharp knife to allow steam to escape during baking. This prevents the crust from puffing up unevenly and potentially bursting. For a lattice top, cut the second crust into strips and weave them over the filling. Again, seal the edges securely. Once your top crust is in place and sealed, brush the entire surface of the pie with the beaten egg wash. This is crucial for achieving that beautiful, golden-brown sheen that makes a pie look truly inviting.
5. Baking the Pie to Perfection:
Preheat your oven to 400 degrees Fahrenheit (200 degrees Celsius). Place the assembled pie on a baking sheet. This is a good habit to get into, as it will catch any drips and prevent your oven from getting messy. Bake for 15 minutes at 400 degrees Fahrenheit. Then, reduce the oven temperature to 375 degrees Fahrenheit (190 degrees Celsius) and continue baking for another 35-45 minutes, or until the crust is golden brown and the filling is bubbly and thickened. You might notice the edges of the crust browning faster than the rest of the pie. If this happens, you can loosely tent the edges with aluminum foil. The best indicator that your pie is ready is to look for bubbling juices in the center. This means the thickeners have done their job.
Letting the pie cool is perhaps the most difficult part, but it’s essential. Allow the pie to cool on a wire rack for at least 2-3 hours before slicing. This resting period allows the filling to set completely. If you slice it too soon, you’ll have a delicious but soupy mess. Once cooled, serve warm or at room temperature, perhaps with a scoop of vanilla ice cream or a dollop of whipped cream for the ultimate treat. Enjoy the fruits of your labor!
Conclusion:
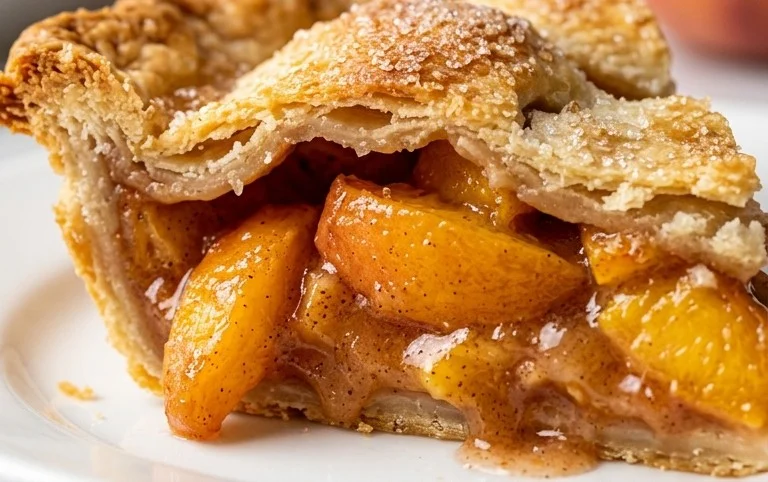
And there you have it – the ultimate guide to crafting your very own perfect peach pie! We’ve walked through every step, from selecting the sweetest, ripest peaches to achieving that beautiful golden crust. This recipe is fantastic because it balances the natural sweetness of the fruit with just the right amount of spice and a perfectly tender crust that never gets soggy. It’s truly a taste of summer in every bite.
For serving, I highly recommend a generous scoop of vanilla bean ice cream or a dollop of freshly whipped cream. The contrast in temperature and texture is simply divine. Feeling adventurous? Try variations like adding a hint of bourbon extract to the filling, or a sprinkle of toasted almonds on top for an extra crunch. Don’t be intimidated; even if baking isn’t your strongest suit, this recipe is designed to be forgiving and rewarding. Give it a try – I promise you won’t be disappointed!
Frequently Asked Questions:
Can I use frozen peaches for this perfect peach pie recipe?
Yes, you absolutely can! If using frozen peaches, be sure to thaw them completely and drain off any excess liquid before adding them to your filling. You might also need to slightly increase the amount of thickener (like cornstarch or flour) to account for the extra moisture.
What’s the best way to prevent a soggy bottom crust?
A few key things help! Ensure your peaches are well-drained. Also, consider pre-baking your bottom crust for about 10-15 minutes before adding the filling. Some bakers also swear by a light dusting of breadcrumbs or finely ground nuts on the bottom crust before filling to absorb any potential juices.
The Perfect Peach Pie
A classic and delicious peach pie with a flaky crust and a perfectly spiced peach filling.
Ingredients
-
1 package pastry for a 9 inch double crust pie (15 ounce)
-
5 cups sliced peaches (slice the peaches about 1/2 inch thick)
-
1 egg (beaten)
-
1 Tablespoon lemon juice
-
1/4 cup all purpose flour
-
1/4 cup cornstarch
-
3/4 cup white sugar
-
1/4 cup brown sugar
-
1/2 teaspoon cinnamon
-
1/4 teaspoon salt
-
2 Tablespoons cold butter
Instructions
-
Step 1
Preheat oven to 425 degrees F (220 degrees C). Line a 9-inch pie plate with one pastry shell; trim and crimp edges. -
Step 2
In a large bowl, gently toss sliced peaches with lemon juice, flour, cornstarch, white sugar, brown sugar, cinnamon, and salt. -
Step 3
Pour peach mixture into the prepared pie crust. Dot the top with cold butter pieces. -
Step 4
Place the second pastry shell over the filling. Trim and crimp edges to seal. Cut vents in the top crust to allow steam to escape. -
Step 5
Brush the top crust with the beaten egg. This will give the pie a golden sheen. -
Step 6
Bake for 15 minutes. Reduce oven temperature to 375 degrees F (190 degrees C), cover the pie with foil to prevent excessive browning, and continue baking for 35-40 minutes, or until crust is golden brown and filling is bubbly. -
Step 7
Let the pie cool completely on a wire rack before slicing and serving. This allows the filling to set.
Important Information
Nutrition Facts (Per Serving)
It is important to consider this information as approximate and not to use it as definitive health advice.
Allergy Information
Please check ingredients for potential allergens and consult a health professional if in doubt.